Post Construction Cleaning Of The Workplace

Post Construction Cleaning

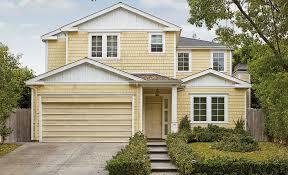
Do you need post construction cleaning for your new home? understand the time and effort renovations and construction take

This service is completed after all phases of the construction work is complete.  Most post construction cleanings follow the same process as the move-in/move-out cleaning services.

the option to allow cleaning inside drawers, cabinets, closets and unfinished areas of the home. Every cleaning product and process use is non-toxic and eco-friendly, so you can be sure A Home Cleaning will leave your new home safe and smelling fresh

Get the Dust Out of Your Home!

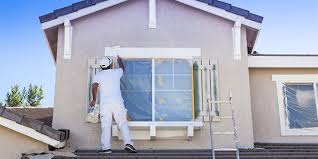
Whether it is new home construction, a remodel, window installation, or a room addition, Home Housecleaning can get the construction dust up and out of your home, and make your home sparkle!

Post-construction team, who have extensive post-construction training and experience – will detail your home and get the dust up and out for you. may also recommend a lighter dust-settle cleaning within a day or two of your post-construction cleaning as well, to remove any residual dust.

What to Expect

Window, shower door and mirror cleaning

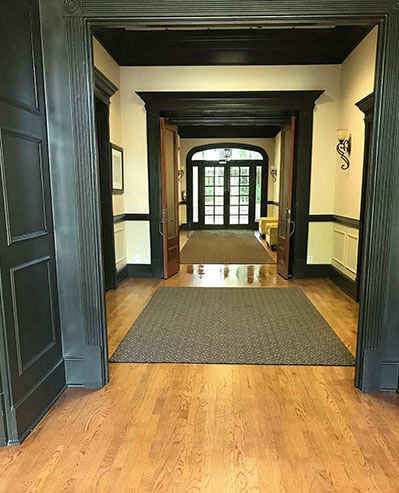
Baseboards, sills, chair rails, doors, mouldings, window and door frames vacuumed and damp wiped

Carpeting and hard surface flooring vacuumed and edged

Hard surface flooring damp mopped

Banisters and hardwood stairs hand cleaned

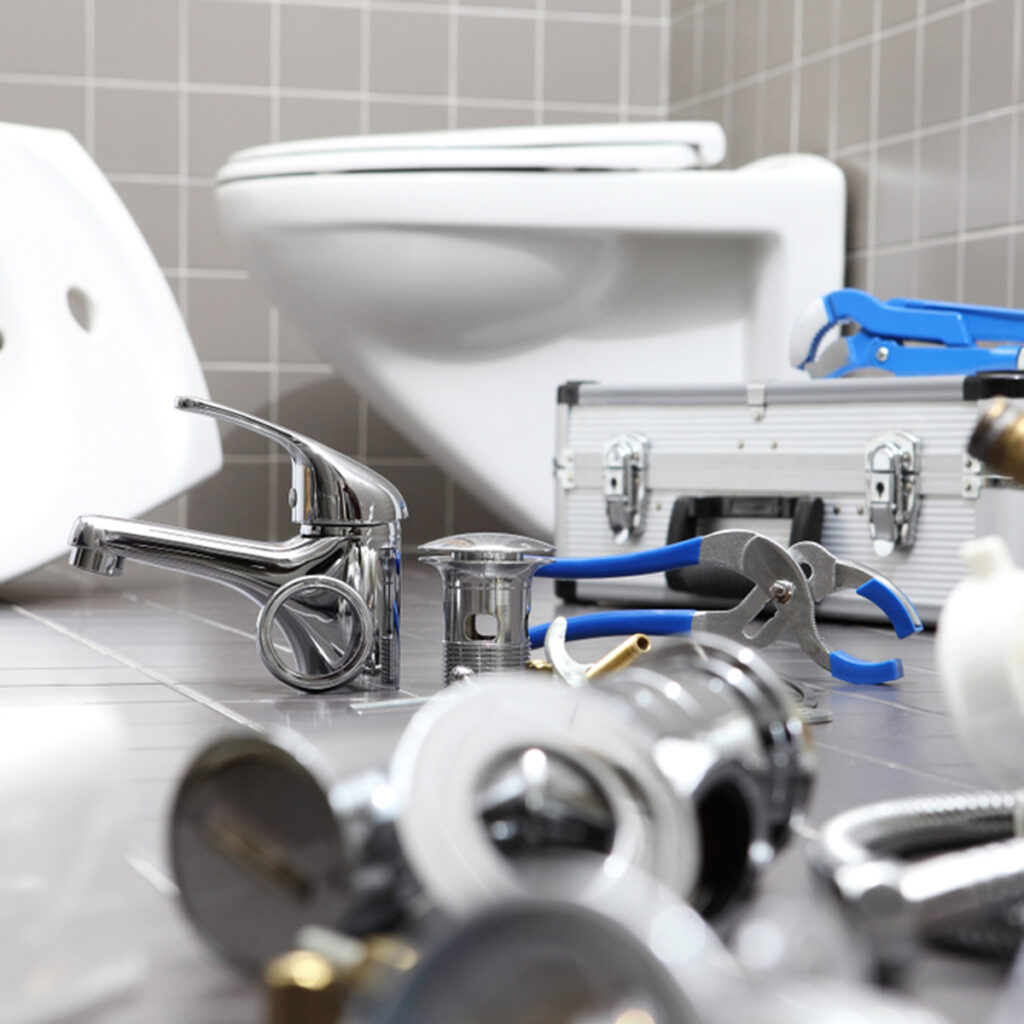
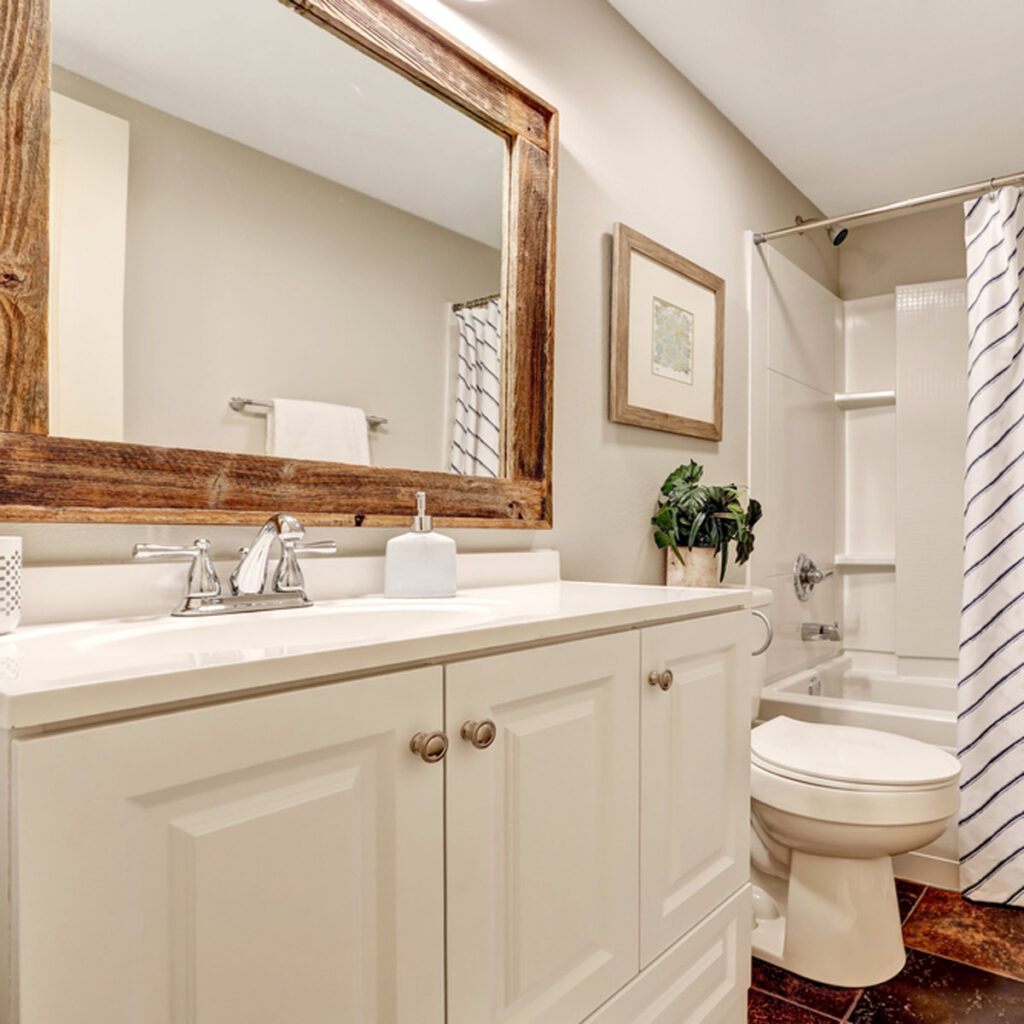
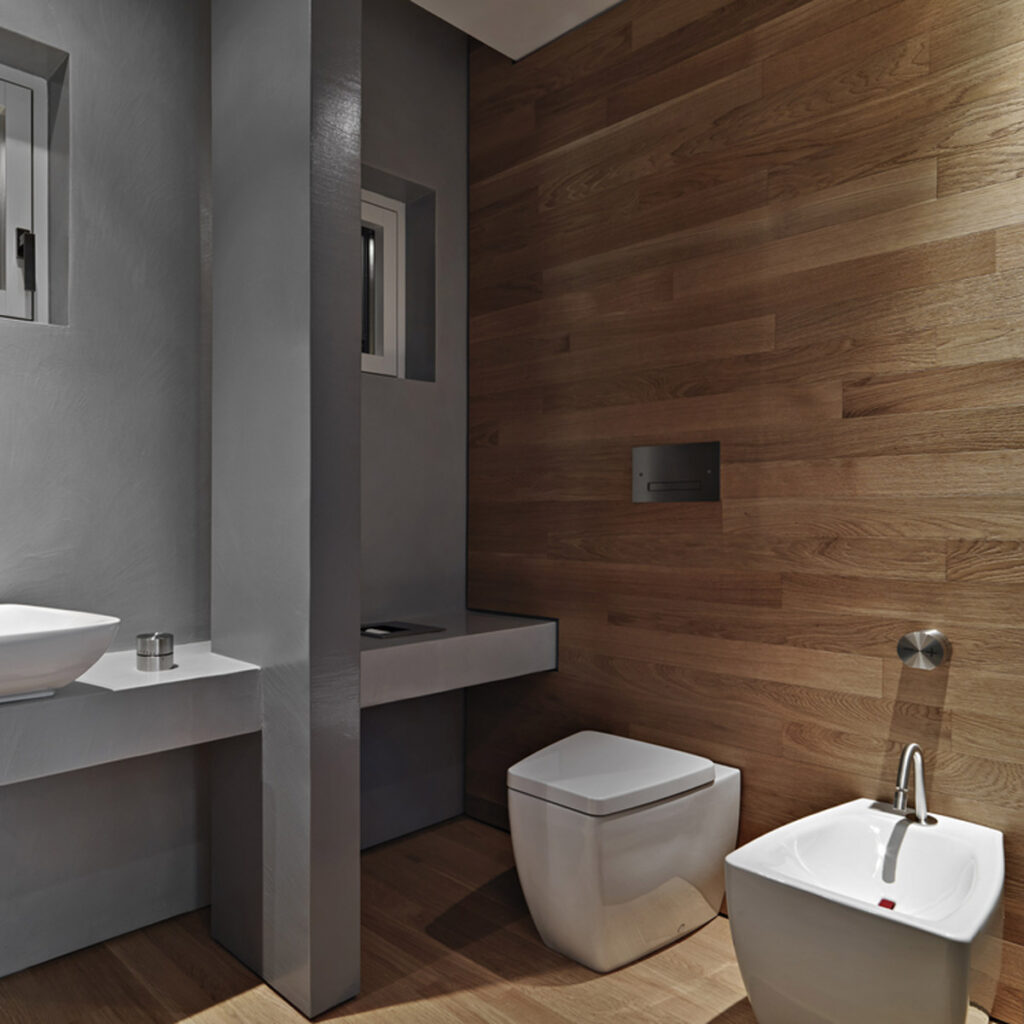
Bathrooms cleaned top-to-bottom (tubs / showers / cabinets / shelving / fixtures / toilets / sinks / bidets)

Kitchen cleaned top-to-bottom (countertops / backsplashes / cabinets –  interior and exterior/drawers – interior and exterior, appliance exteriors, range hood)

Furniture vacuumed and hand wiped

Switchplates cleaned, light fixtures damp wiped

Construction dust removal

Post Construction Cleaning Services

Post construction cleaning is a service that’s often overlooked. With the amount of left over materials, junk and the dust and dirt generated during the construction activities, cleaning up afterwards can be a BIG chore!

The reality is that most construction firms often overlook the necessity of cleaning up the job site once they’re done; most of them are focused on how their project went. So what this really means is that they don’t have the necessary time and tools to properly clean up after themselves.

A Perfectly Clean Building

Construction work generates lot of dust, dirt, junk and left over construction materials of all types. If you’ve to meet a fast approaching deadline, it can be a big nightmare to clean up and tidy your place up in time for opening.

No More Hassles

Cleanup after any construction activity can be a big hassle at any workplace. Looking at all this mess and dust alone can give you a headache. Sometimes you can delegate cleanup to employees, but the can be a bad for their morale.

No Need To Arrange Waste Disposal And Cleaning Supplies

have the necessary know how, tools and the right attitude to tackle all kinds of post construction clean up. can clean floors, walls, ceilings and can basically prepare the entire building for the inauguration day. can also safely handle waste disposal according to local waste disposal locations.

You and Your Workforce Can Concentrate On The Real Job

Once you hire the pros to handle the post-construction cleanup, you can concentrate on the job you are trained to do. This way, you can put your time to better use!

No Need For Extra Employees

If you’re a construction or remodeling service, outsourcing the cleaning job to Cleaning Service will help you avoid hiring extra workers for the cleaning part. Think of insurance (health, workers compensation), salary, and numerous other benefits to be paid when hiring extra employees. Assigning the task of cleaning your building or office post-construction to professionals will definitely save you good money

how much is post construction cleaning?

so we are in a bad situation. in short, GC is a crook and stole our money. even though it is not finished we are trying to get in as quickly as possible. our floors are ruined due to cupping (moisture issues have been resolved) and we will need to get them refinished, hopefully after the holidays. i’m planning to get a cleaning crew in when the floors have had a chance to cure and then work out the rest of the details while we’re in.

so i make my first call to try and line up post construction clean up. the house is roughly 6800 sq ft, 5 bedrooms, 6.5 baths, mudroom, kitchen, office, living room, great room, play room and a few larger than average closets. there are some two story ceiling heights and all the walls would need to be wiped down, so there are tall surfaces that need attention. how much do you think it would cost to clean?

obviously i have several more calls to make. the first “gentleman” i spoke with today quoted me …wait for it …$6456.00.

Overall, that $6456 bid seems high to me but of course it all depends on just how messy your contractor left things and how expensive cleaning labor is in the area where you live.

In order to save money after we fired our crooked contractor, we did all the post-construction cleaning ourselves with the help of a bunch of very dear friends. A dozen of them actually threw us a “house-cleaning” party.

NEW CONSTRUCTION CLEANING SERVICES

Quick & Efficient new construction cleaning for your business.

It’s just natural that there will be debris, dust, and other types of construction material when a new structure is being built. Consequently, cleaning after the construction is completed is essential to help prepare your new property for occupation. This unique type of cleaning requires specific tools and techniques.

Some of the things we do in a construction clean include:

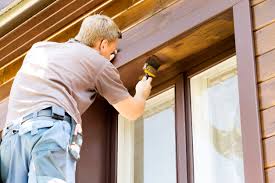
Remove window labels

Vacuum window tracks

Clean windows and sills

Clean/vacuum cabinets and drawers

Wipe down all surfaces including: doors, bookshelves, baseboards, trim to the molding, countertops, windowsills, tops of doors, fireplace mantles, and staircase rails

Clean showers, tubs, toilets, sinks, bathrooms and kitchen areas

Remove stubborn adhesives

Rinse and polish all porcelain surfaces

Clean windows, mirrors, mop floors

Vacuum out the ductwork with a vacuum hose

Wipe the electrical outlet cover

Gently wipe the light fixtures and chandeliers

Clean or sweep out garage

This list is can be customized to your specific project. pay attention to the small details to ensure that the space is cleaned to your specifications.

Trends In Bathroom Remodeling

Things to Consider Before You Remodel Your Bathroom

Spring is here with warmer temperatures and fresh ideas for home renovations. The bathroom remodel is one of the most popular rooms to update since it is one of the smaller rooms in your home and typically a high traffic area. The best part: a bathroom remodel has one of the highest returns on investment of any home renovation. There are a lot of reasons for bathroom makeovers: you need more storage space, you want to install a spa-like shower or update an old bathroom with new amenities…or maybe all these reasons.

What’s my budget?

The size of your renovation will dictate the budget so you need to decide if you want a partial or complete bathroom renovation.

Answer these questions about your bathroom remodel ideas: What do you want it to look like? How do you want it to function? How often will you use it? How many people will use it? What materials do you want to use? How do you want it laid out?

Do your Research on:

Bathroom fixtures, products and accessories cost.

Any bathroom renovation companies bids and labor cost.

Keep in mind you can always add the extras or luxury items down the road.

After you calculate your cost, add a cushion-10% for possible unforeseen issues that can arise or last minute changes.

Next Determine: “How an I going to pay for it?”

Maybe you’ve been pinching pennies to save for it or you just received a hefty tax return. Many remodelers turn to a home equity loan to cover the bathroom remodel cost because, in many cases, it can be tax deductible. Be sure to shop around for the best interest rate, loan rates and repayment terms.

Bathroom Remodel Vs Professional Remodeling

Bathroom remodeling can be suitably defined as one of the more challenging home improvement projects. But on the other hand, the project pays off in terms of resale value very well too. In fact, it will be apt to say that it has a great pull for prospective buyers.

But because it’s a challenging AND important task, it definitely requires skilled hands to handle at least some aspects of the project. The good thing is that there are a few things you can easily DIY. For the others, however, you are better off trusting a professional remodeling company.

And besides, it’s only a professional that can tackle the unexpected surprises that arise during the process. Take, for instance, the rusted and rotten pipes that are about to give way or suddenly revealed leaks that need to be repaired. Then there are those wet black spots on walls that point towards mold, or the rattling sound some plumbing lines make. Besides, a little knowledge can be a dangerous thing. Going exclusively DIY in bathroom remodeling may prove dangerous later on.

Costs of a Bathroom Remodel

Before you plan anything, you need to have an idea of the difference in the cost of both types of remodeling. The cost of bathroom remodeling will fall somewhere between $3,000 to $30,000. Within this range, expect to pay the contractor anywhere between $5,000 to $15,000, depending on the bathroom size. The cost of fancy materials, the fixtures, repairs, and other changes is extra, of course.

The Time Factor of a remodeling Project

This one is the simplest to fathom. In fact, over the years, we’ve heard and read about so many DIY projects that went up to six months or more. Honestly, do you really have that kind of time? Let’s face it. You don’t have a crew that’s trained to do a specific job. As a DIYer, you can only do so much when you look up tutorials on YouTube.  Besides, you need to be realistic. You cannot block your bathroom for as long as it takes, especially if you do not have a spare one. Most professionals, on the other hand, will be able to take on the project from the design stage itself and deliver within a few weeks.

Ways to Save Money During Your Bathroom Renovation

Keep Plumbing Where It Is

It may at first seem like a good idea to renovate your bathroom’s design, but unless you’re willing to shell out about $5,000 each time you move plumbing fixtures, you might want to keep your existing fixtures in place

Frame Your Mirror

The focal point of your bathroom is likely the mirror over your sink, so why not fancy it up? Not only will adding a frame around your mirror make for an elegant look, but it will also hide any age-related wear around the mirror’s edges

DIY a Vanity

To save during a bathroom renovation, hit up those antique stores, flea markets and resellers for a beautiful old dresser you can spruce up and reuse in place of your outdated bathroom vanity. It makes for a great DIY project, and you’ll be able to easily cut out the space to hide the plumbing, seal drawers, add towel bars on the sides and put a sink in it or on it

Skip the Tile

While tile makes for a clean and sleek look, having it from floor to ceiling can cost a hefty amount. Consider alternatives like reclaimed wood panels, which create a more warm and rustic look that can accent white fixtures and other minimalist elements.

Check Online for Extras

When other people remodel their bathroom or other parts of their home, they sometimes have leftover tiles that they’ll sell on Craigslist or eBay. Scour the sites in search of people’s leftovers, which will likely be up for grabs at a steep discount, since they can’t return them! Purchase as much as you can, then buy the rest from a local home improvement store.

essential questions to ask your bathroom remodeling contractor

“The biggest mistake a client can make when working with a bathroom remodel contractor is not asking enough questions and being part of the process,” says Michael Big of Big Brothers Development. “The last thing a contractor wants to deal with is a client who isn’t happy with the final product.”

Can I see examples of your past bathroom remodeling work?

Read your contractor’s reviews. Comb for details on their punctuality, communication skills, work environment cleanliness, and work quality. But if you see negative reviews, don’t dismiss the pro right away. Look at how they respond: if they show strong communication and conflict-resolution skills, they may still be a good fit.

Do you take on bathroom remodeling projects of my scope?

Some contractors specialize in certain kinds of projects. For example, one contractor may do bathroom additions, while another focuses specifically on small bathroom remodels. Asking this question upfront will save everyone the time and effort of a site visit. Also, if you need bathroom design services, make sure to ask if your contractor has design training. If not, consider hiring an architect or designer.

How many projects do you run at the same time?

You want a company that has time for you and has long-term relationships with its subcontractors. Make sure you and your contractor have the same expectations about how often they will be onsite once the project kicks off. The contractor should be open with you about how long each stage of the project will take, and they should show a good understanding of what factors could potentially push that timeline out.

Who will be working in my home?

Many general contractors serve as the business head and hire foremen to run projects. Ask to meet the project manager and make sure it’s someone you want at your house every day. Depending on the elements of your bathroom remodeling project, your contractor will probably bring in more specialists.

Complete bathroom renovation guide: from basins to bathtubs

Once you consider what’s involved – plumbing, tiling, tapware, baths and basins – it’s easy to see how the costs can quickly add up. Because there are so many different elements and trades involved with a bathroom renovation, it’s important to plan and budget accordingly.

BATHTUBS

When you actually have time for a good soak, you want to enjoy it. Make sure you head to a showroom to try your bathtub before you buy it.

Budget: Inset baths sit into a tiled hob and is a more traditional-looking bath. From $120.

Mid-range: For a more designer look, many inset baths are moulded in slick, modern shapes. These can cost from $330 to $700.

Premium: If you have the room, go for a freestanding bathtub. They come in a variety of styles and materials from acrylic or resin to stone and metal. You’ll pay up to $800, or more.

TOILETS

Toilets can range greatly in pricing depending on the quality and look you’re after, but here are the basics.

Budget: A simple link suite is where the cistern is mounted to the wall and is separated from the pan with a PVC apron. You can buy one for under $150.

Mid-range: A close-coupled suite is where the cistern sits directly on top of the pan, which creates a cleaner look. A wall-faced suite sits flat against the bathroom wall, hiding water connections for a modern, easy-to-clean finish. $135 to $500.

Premium: If you want a high-end look then go for a concealed or in-wall toilet where the cistern is built into the wall cavity so only the buttons show. You can have it floating off the floor, too. $600 to $1000.

How To Take Care Of Snake

Tips To Better Reptile Handling

Some reptiles are very tolerant of handling, and others should not be handled unless it’s necessary for husbandry or health. These concerns should be addressed before a rhythmic pattern of interaction can be established.

Respect             

Herps are in captivity for our enjoyment, and we owe them every ounce of respect we have to make their lives as pleasant as possible. For us this means that if we are not 100 percent comfortable and confident with the animal we are working with, then we should gain the knowledge with a smaller specimen, a less difficult species to maintain, a less aggressive similar species, or work with the species under the supervision of an experienced herpetoculturist

It can also mean starting with reptiles in our budget regarding three key areas: housing, husbandry and acquisition. Always try to buy the best housing and husbandry tools you can afford first and then figure out what animals fit within your budget. Too often the opposite happens, and the animal suffers.

If you address these primary points from the start, your reptile will be happier in the long run, and you will be, too. This creates a more positive interaction on a daily basis, which undoubtedly creates a platform for the best possible relationship with your pet.

Confidence Counts

This is key for herpkeepers of all levels. Confidence leads to acute decisions. Acute, confident interaction eliminates fearful jerking of your body, hesitant approaches, and timid assessments of husbandry and health.

HOW A SNAKE BREATHES WHILE IT EATS

Just because they work for a conservation board doesn’t mean that naturalists know everything

She wasn’t sure what the hole was, so we started to research it — the best way to answer a question that you have — and found out the hole in the bottom of a snake’s mouth is a glottis.

Snakes have nostrils, just like humans, and they breathe through them and use them to smell. However, their best sense of smell comes from using their tongue, and they can also breathe through their mouths, like humans, by using their glottis.

The glottis is the opening in the bottom of a snake’s mouth that is kept closed except when inhaling. It is connected to the trachea, or windpipe, which lets the air that is inhaled fill its lungs.

The glottis is extremely helpful, because when a snake is eating, it can move its glottis off to the side so that its prey does not prevent it from opening and allows the snake to still breath while it is eating. It’s like chewing with your mouth open — it’s bad manners for people, but not for snakes!

Corn Snake

Natural History

Corn snakes are a very commonly kept pet snake originally from the southern states in the USA. They were given their name because they were commonly found hunting mice in corn stores. They are considered harmless to humans and have a very important role in controlling rodent populations particularly around farms.

Corn snakes are probably the most popular pet snake in the UK and have been kept and bred for decades. Originally they were red/orange and brown but they have since been selectively bred for a range of pattern and colour combinations. While they can get quite long they remain slim and easy to handle. They generally have a very passive attitude making them a great choice for first time keepers.

Housing

Corn snakes come from a warm environment so they struggle with the cold and humidity of the UK. To insulate against both of these factors we recommend keeping the snake in a wooden vivarium. Due to the temperature gradient required we would normally select an enclosure a minimum of 3 x 2 x 2ft with large vents and glass sliding front doors.

Corn snakes can be a little shy when they are young. We still use the full size enclosure to make sure that the correct temperature gradient is in place but we will provide more decorations to begin with.

Heating

Naturally, corn snakes would be experiencing temperatures of around 90of in the sun. We try to provide this heat over 1/3 of the enclosure while letting the rest of the enclosure cool to 70of on the opposite side. To achieve this we attach a basking lamp to the ceiling of the enclosure on one side. This is controlled by a dimming thermostat to make sure that the temperature is kept correct throughout the day. Corn snakes will be able to reach the top of their enclosure without decorations to climb on so the basking lamp must be surrounded by a guard. The basking lamp is left on for 10-12 hours per day.

Snakes

The skin of an animal is a complex organ which periodically undergoes renewal. The old dead layers of cells must come off to make room for the new layers of cells formed underneath. In people, tiny, almost invisible pieces of old dead skin come off with every bath. A person with a cast on a broken arm or leg cannot bathe the area under the cast and, as a result, finds a thick layer of dead skin built up when the cast is removed. Amphibians and reptiles shed layers of old, dead skin in large, visible pieces, some molting the entire old skin in one piece. This process is called ecdysis. Ecdysis is natural for the renewal of skin but is not necessary to allow growth, as it is in arthropods and crustaceans. Occasionally problems develop during the process of shedding. This page will discuss normal shedding as well as symptoms of abnormal shedding and its treatment.

Snakes normally shed their skin in one piece. This may occur from 4 to 12 times a year, with young, rapidly growing snakes shedding more frequently. Snakes lack eyelids, and instead have a clear scale called the spectacle to cover and protect the eye. During ecdysis the dead outer layer of the spectacle is shed. The lining of the heat-sensitive pits on the face of certain boas, pythons, and pit vipers, and the outer layer of the spurs on boas and pythons are also shed at the same time as the skin. The dead layer of skin from the points of the forked tongue is shed periodically at other times than the rest of the skin. These tongue sloughs are the length of one fork of the tongue, pointed on one end and flat on the other, and appear somewhat worm-like. They are usually found in the water bowl but may be seen elsewhere in the cage.

As a snake approaches ecdysis, the skin pattern becomes dull and dark. A milky appearance is seen on the belly scutes of some species and the spectacles become milky white, obscuring vision. A snake in this condition is said to be “opaque,” “pre-shed, or pre-ecdysis.” During this time the old layer of skin is fragile and tears easily, but the new skin underneath isn’t mature yet. To avoid damage and possible scarring, handling should be avoided and care should be taken to be gentle if handling becomes necessary. Opaque snakes normally become inactive and hide, are quite irritable, and refuse to eat. A snake typically remains opaque for about 4 to 7 days after which the eyes become clear and actual shedding takes place 4 to 7 days after that. Snakes shed by rubbing their nose and face against objects in the cage. As the skin comes loose it peels back over the head and neck, turning inside Out as the snake crawls out of it. The skin normally comes off in one piece. Placing a rock, brick, branch, or log in the cage may assist the snake by giving it something rough against which it can rub, but most snakes in plain cages seem to have no trouble shedding their skin.

If the skin fails to come off in one piece the condition is called dysecdysis. A snake with dysecdysis should be soaked in shallow lukewarm water for 30 to 60 minutes, and then all the remaining dead skin should be manually removed. Snakes can drown when confined in a container with deep water, so exercise caution. An alternative to soaking is to confine the affected snake overnight in a thoroughly wetted cloth bag.

All shed skins should be inspected to make sure the spectacles came off with the rest of the skin. Retained spectacles should be removed by gentle rubbing with a cotton swab after soaking or bagging as above. Inexperienced people should never try to remove the spectacles with forceps since sometimes the entire spectacle, rather than just the dead layer is inadvertently removed. This causes corneal exposure and can cause blindness. Sometimes the last half inch of skin on the tail tip fails to come off. If left on, it will shrink as it dries, cutting off the blood supply to the tail tip which then dries up and falls off. This piece of skin should also be gently removed after soaking.

Is A Pet Snake Right For You?

A pet snake can be a wonderful companion, but choosing to keep one should not be taken lightly. Contrary to popular belief, they are not cold or slimy and most varieties aren’t dangerous. They are easy to keep in small spaces, as their lifestyle doesn’t require a lot of exercise. Snakes are quiet and you don’t have to take time out of your day to walk them or clean up an excessive amount of excrement. If you are squeamish however, their dietary needs may be a deal breaker. Pet snakes are great for the right family – as long as you are willing to meet some of their more unsavory requirements

Reading about and understanding the requirements of owning a pet snake is the first step to a successful relationship with your pet. Decide what type of snake you would like to own, and then do as much research as you can before bringing one home. Common types of pet snakes for the first-time owner include ball pythons, king snakes, gopher snakes, garter snakes and corn snakes. Most of these snakes stay relatively small, growing to about 4 or 5 feet at the largest. These species tend to be gentle and don’t mind being handled. Poisonous or other dangerous snakes should be avoided by all but the most experienced snake enthusiast, and even then liability issues make these kinds of snakes a poor choice. Most snakes can live a very long time in captivity, so be aware of this when you are choosing one for your home. King snakes can live about 20 years, while ball pythons have been known to live as long as 40 years. While some of the housing requirements are similar for most kinds of snakes, their temperature and dietary requirements can be very different.

Housing Your Pet Snake

Before you bring home your new pet, you should have the enclosure ready to go. It should be big enough to house a grown snake, and may take up a large corner of the room. Most pet snake owners opt for a large glass aquarium or Plexiglas enclosure with a tight mesh top. Pet snakes make Houdini look like an amateur and can escape through tiny holes in a wire cage, so you need to make sure that it is secure. Glass or Plexiglas also makes it easier to regulate the temperature in the enclosure so that your snake will stay healthy.

The snake needs to have some sort of bedding material in the bottom of the enclosure. Materials such as butcher paper, newspaper, terrycloth towels are good materials; indoor or outdoor carpet is ideal because the material is safe and easy to clean. Pea gravel or wood chips may look nicer but can harbor bacteria that could be ingested when the snake eats, causing intestinal problems. A pet snake also needs a private area in order to feed well and feel secure. A hollow overturned log, a wooden box with a hole in the front or even just a large silk plant will work nicely. They need to have something to climb on, so clean branches from the pet store or shelves are a must to keep your pet occupied. Just make sure that they can’t open the top of the enclosure as they are exercising.

Pet snakes also need a higher temperature than you are probably used to keeping in your home. Most tropical snakes need a temperature between 80 and 85 degrees Fahrenheit during the day and 70 to 75 degrees at night. American snakes like a constant temperature of between 70 and 80 degrees. You can keep a heating pad under one side of the enclosure or use a heat lamp to achieve this temperature, but make sure that there is a “cool” side of your snake’s home to escape to if they get too warm. Most snake experts warn against keeping heating elements such as rocks inside the enclosure as the snake can easily overheat or get burned. The snake’s enclosure should get about 10 to 12 hours of daylight and 12 to 14 hours of darkness each day. A location where they can get some unfiltered natural sunlight is ideal.

LED Electrical Lighting Information

Lighting

The lighting in your home affects how you feel. It’s more than just a practical convenience, so the more control you have over your lights, the better. With a few different light sources, you can easily change the mood to suit whatever you’re doing in any living space. From creating a romantic atmosphere to chopping carrots, and everything in between.

The right light for the right situation is important for our well-being. Smart lighting lets you create mood and atmosphere. Choose a light for early mornings, for late evenings or for cooking or working at home. Dim, turn off, turn on, switch from warm to cold light using a remote control or app.

With the flick of a switch or a tap on an app, you can change a room’s atmosphere with a lamp or light fixture. Want a cozy, calm vibe for movie night? Some pep to start your day? Indoor lighting can set the mood, add style and of course, brighten things up. We’ve got indoor lamps covered from floor to ceiling.

What would you do with 25,000 hours? Read your overdue library books? Finish that epic puzzle? Whatever you do, LED lighting can keep you company because that’s about how long LEDs last. We’ve got a variety of LED lights, too, like strips under a cabinet or a work lamp in your laptop’s USB.

What hangs out in a room even when nobody’s there? Ceiling lights! From spotlights to flush ceiling lamps to pendants and chandeliers, they provide general light and their designs say specific things about style. Whether you want an industrial feel, a natural touch, a retro vibe or another look, we have a ceiling light for you (and to keep your furniture company).

The Best LED Light Bulb

If you want basic light bulbs that look great and will save you money in the long run, there’s no reason not to choose LED bulbs—they look as good as incandescents and are far more energy-efficient. We recommend Cree’s Exceptional Light Quality line of A19 bulbs. For general-purpose lighting, look for soft white LED bulbs, available in 60 W and 40 W versions. And for a whiter, cooler light for working, get Cree’s daylight LED bulbs, also in 60 W and 40 W versions. The Cree bulbs also function well with dimmer switches, neither flickering nor buzzing, and their color accuracy brings out the best in your decor, furniture, and food, improving the ambiance of your entire home.

Everything in your home looks great under the light of these bulbs, which have a high color accuracy that made fruits and decor appear natural and realistic in our tests. Unlike some LED bulbs, the Cree bulbs could dim all the way to zero without flickering or buzzing. Both the Soft White and Daylight versions performed equally well across all our tests. Cree’s bulbs have a 10-year warranty—the longest we’ve seen—and they are affordable, too.

If our pick is unavailable, we recommend Feit Electric’s basic, dimmable bulbs, including the Soft White and Daylight 60 W Equivalent Dimmable A19 Light Bulb. Both produce crisp color accuracy that’s as good as or better than that of the Cree bulbs, and they are just as easy to find online or in stores across the country. The Feit bulbs also offer smooth dimming without flickering or buzzing, although these could not continuously dim at the absolute lowest levels as well as the Cree bulbs. At around $2.50 a piece (depending on how many you buy) with a five-year warranty, the Feit bulbs are a cost-efficient way to brighten up your home.

Why you should trust us

We’ve read countless product reviews and articles about the science and design behind LED bulbs, and have interviewed lighting experts including Sal Cangeloso, author of LED Lighting: A Primer to Lighting the Future; senior lighting designer Geoff Goral, of the architectural lighting design firm Lighting Design Alliance, who assisted us with extensive professional testing; and Dr. Scott Brodie, an ophthalmologist at NYU Langone’s Department of Ophthalmology.

Who this is for

We generally recommend LED (light-emitting diode) bulbs if you’re shopping for any light bulbs, regardless of whether you’re furnishing a home or replacing a burned-out pantry light. LED bulbs are better for the environment and your budget. They’re significantly more efficient and longer-lasting than CFL, incandescent, or halogen bulbs, so this ultimately saves you money over the life of the bulb. They’re also much less prone to breaking than the fragile filaments that comprise their incandescent counterparts. Many LED bulbs are actually made of plastic, which makes them safer to touch and more durable when you’re screwing them in or accidentally knocking them onto the ground, like we’re constantly doing—oops. (Don’t worry, that’s fine, because they’re LED.)

How to Choose the Right Light Temperature for your Bulb or Fixture

Light appearance is measured in temperature using the Kelvin scale.   Unlike the weather outdoors lower color temperatures (2700K) indicate ‘warmer’ colors of orange and yellow, and higher color temperatures (6500K) indicate cooler colors like blue and white.

Know Your Color Temperatures

Most bulbs will advertise color temperature on the package.  This will tell you how warm or cool the color of the light is.

2700K – 3000K – This is the warm or soft white range, best suited for areas in the home where you want to relax or entertain.

3500K – 4500K – This is more a neutral white light range, giving a balance between warm and soft color light.

Over 5000K – Generally referred to as daylight and best suited for use in offices, workshops, bathrooms or other areas where high detail visibility is important. It can also help energize you in the morning.

Some people will also just have a preference for a certain color temperature or mood.  You may even notice a color temperature will look better on your particular skin tone.  The good news is there are options for everyone.

There are also bulbs and light fixtures that adjust color temperature so you can adjust the light to fit your mood or tasks through out the day for even more variety.

Light Bulb Buying Guide

Your Best Light Bulb Choice

Today’s light bulbs are primarily light emitting diodes (LED). LED bulbs fit standard light sockets and are the most energy-efficient light bulb option. They have lower wattage than incandescent bulbs but emit the same light output. This allows them to produce the same amount of light but use less energy. LEDs can last 20 plus years and don’t contain mercury. You may still have some compact fluorescent light bulbs (CFL) in your home; go ahead and use them. Here’s a quick overview of how LEDs work.

LED bulbs use an electrical current passed through semiconductor material to illuminate the tiny diodes called LEDs. The heat produced is absorbed into a heat sink, keeping the bulbs cool to the touch. LEDs are available for outdoor use; just make sure the packaging indicates the bulb is rated for outdoor use. LEDs don’t contribute to heat buildup, which helps save on air conditioning.

The Facts of Light

The type of lighting you choose for a room directly affects the atmosphere and the mood. Combining the correct light fixtures and light bulbs illuminates your home and gets both flattering and useful results. To get the best quality of light for your lifestyle and home, you’ll need to know a bit about the science of lighting. For more on lighting and its role in home décor,

Lumens and Watts

Lumens: The amount of light emitted from a light bulb. More lumens equals brighter light; fewer lumens equals dimmer light. Standard 100-watt bulbs produce about 1600 lumens

Light Color

Light color or light appearance is measured on the Kelvin (K) temperature scale. Lower Kelvin numbers means more yellow light; the higher the Kelvin number, the whiter or bluer the light.

DIY LED PROJECT

Things to Know Before Buying and Installing 12V LED Strip Lights

Flexible LED strip lights are used all over the world in various industrial, commercial and residential projects. LED strip lighting is popular among many Architects and Lighting Designers due to the improvements in efficiency, color options and brightness. The biggest draw is how easy they are to install. Their flexibility, low-profile and helpful accessories make them the most popular LED strip for the at home DIY types. With these LED strips, a homeowner can design like a professional with the right supplies and just an hour or two.

There are many options for LED strip lights with no simple ‘one size fits all’ standard to go by. This LED Strip Resource Guide will educate newcomers and experts alike on finding the best LED strip lights for the job and how to use them while overcoming common installation hold-ups.

LED Light Strips: What Makes them so Special?

LED strip lights, also known as LED tape lights or LED ribbon lights, are known for their low-profile size and flexibility. Efficient LEDs sit on a 10mm wide circuit board, offered in 3ft to 16.4 ft lengths.

Cut-to-size – Cutting LED strips is very simple thanks to the cut lines along the strips. At each cut point there is a black line with copper solder pads that sit on each side. The copper solder pads make it so each strip piece is addressable even after being cut. This makes it possible to connect LED strips together or connect the strip in a different area of your home.

Flexible LED strip with Adhesive – The LED strips have a 3M adhesive backing for simple mounting options. The low profile, flexible strip has a peel-off backing which exposes the 3M adhesive, making for a simple peel-and-stick install.

The Right Weather For Home Exterior Painting

GREAT TIPS FOR USING LEFTOVER PAINT

As paint users we should properly manage and if necessary dispose of leftover paint. To minimize clutter and avoid spills or unsafe disposal, it is important to consider ways to limit paint waste.

Always consult your local city or environmental regulatory agency first for guidance on disposal options. Do not pour paint down a drain or into a storm sewer. The dangers of such disposal methods might not be immediately obvious, but improper disposal of paint can pollute the environment and may pose a threat to human health and natural resources.

1. BUY THE RIGHT AMOUNT OF PAINT

Estimate the amount of paint needed by measuring the area to be painted and calculate the gallons to be used. Review the coverage area set forth on the Product Data Sheet of the product you have purchased.

2. STORE PROPERLY

After you finish your project, leftover paint should be sealed and stored in an area that will protect it from damage, freezing and temperatures above 95°F. Make sure that any leftover paint is out of reach of children and pets.

3. SAVING FOR FUTURE USE

Leftover paint can be used for touch up or other creative projects. You can also experiment and mix colors for small projects.

4. DONATE

You can donate leftover paint to a friend, neighbor, school or charitable organization in need of paint. You can use social media to offer it to your friends to find a local person or organization in need of paint. Pass it on!

5. DISPOSAL

a. Latex Paint

If there is not another management option, latex paint can be dried with absorbent material such as cat box filler, shredded newspaper or sawdust. Never throw away leftover liquid paints in your trash. Once it’s dry, dispose of the dried out latex paint as solid waste. Please note that the state of California does not permit the treatment of latex paint waste including air drying. Instead, locate a PaintCare location for recycling your leftover paint or a disposal company.

b. Solvent-based Paint

Solvent-based paints are ignitable and present additional hazards to the environment from the solvents. Save solvent-based paints for a household hazardous waste collection program or contact your local/state government environmental protection agency for guidance on reuse or disposal of unwanted solvent-based paint products. States with PaintCare will collect and properly dispose of leftover Solvent-based paint.

Exterior Paint Selection

Painting the exterior of your house may seem like a job for professionals, but if you’ve got the motivation and some basic knowledge of paints, it’s a job you may want to tackle yourself. It could save you a lot of cash. Latex exterior paints have undergone improvements, and some can be as durable as oil-based.

Below are some tips on selecting exterior paint, from home-improvement specialist James Young. There are two basic types of exterior paint to choose from: oil-based and the more commonly used latex.

  • Oil-based paints are very durable and water-resistant. They result in hard finish and are often used by professional painters. Use an oil-based if the surface you are painting has already been painted with oil-based paint.
  • Stir oil-based paint frequently, as the oil in these types of paint tend to separate quickly.
  • If using oil-based paint, be sure to use a brush or roller specifically designed for use with oil-based paint.
  • Latex exterior paints have undergone many improvements, and some can be as durable as oil-based. They are also considerably easier to work with. Be sure, however, that you select an exterior latex for use on the outside of your home, not the same latex used on interior walls.

Tip: Here’s how to determine whether you have acrylic or oil-based paint on your home now. Peel off a large paint-chip. If the chip bends slightly before cracking, it’s probably latex. Oil-paint chips tend to snap easily. If this test doesn’t work for you, take a paint-chip sample to your local paint store or home center and have them test it.

  • Latex is easy to apply, dries quickly, is durable and is resistant to the effects of direct sunlight. Cleanup is easy, and just requires water.
  • Acrylic latex is the highest-quality latex paint. It will cover just about any building material including masonry and properly primed metal.
  • Important: Never put a new coat of latex over an old coat of oil-based paint. It will almost certainly peel.

Diagnose Common Paint Problems:

Poor Prep and Excess Moisture

Take a good look at your house before you start painting. You may have to correct some of the wrongs that the previous painter overlooked in desiring to get the job done fast.

Poorly prepared surface

You may notice the finished coat of paint peeling away from another coat underneath (Figure A). This is the result of painting over a poorly prepped surface. Usually the surface wasn’t cleaned before painting or the primer coat was left too long before the finish coat of paint was applied. You can remedy this situation by firmly scraping away the paint to get at the surface below. Scrape until you get down to a solid surface that may be part bare wood or a sound, previously painted surface. Sand and clean the surface thoroughly, let it dry, and prime all bare wood and spot-prime any small bare spots.

Excess moisture

Sometimes you find paint and primer falling away from the bare wood surface. This is most likely caused by water getting behind the wood or even moisture from the home’s interior. You can’t repaint here unless you stop the source of the moisture migrating through the walls, especially from bathrooms and kitchens. Adding ventilation such as an exhaust fan in the room can frequently help the problem. Many older homes have no vapor barrier, but sometimes applying a vapor barrier paint on the inside will do the trick. If you’re stymied, consult a building contractor to help you solve the problem. Then scrape and sand to remove the loose paint.

Alligatoring

Another common problem is cross-grain cracking, sometimes referred to as “alligatoring.” The source of this problem is usually paint buildup from several layers of oil-based paints. Unfortunately, there’s no magic bullet for this fix. You’ll have to scrape off all the old paint down to bare wood and then sand the surface. Take precautions and gather this paint onto drop cloths or plastic for disposal because it may contain lead. Don”t keep applying layers of paint to areas that don’t need it such as porch ceilings and eaves where the surfaces are protected. Often a good cleaning is all they need.

Other problems

You may find dark mildew spots on the finished coat of paint along shady areas of the house. Buy a special cleaner at paint supply stores to scrub the surface. You can usually stop mildew by increasing exterior airflow in that area, trimming plants close to the house, and channeling water away with gutters and downspouts. If the area is tough to air out, you can get mildewcide additives for your finish coat of paint.

Another problem is chalking, where old paint surfaces get powdery. This is natural for old paints, but you’ll have to power wash or scrub the surface and do some light sanding to remove the chalking before applying paint.

POINTS TO CONSIDER JUST BEFORE EXTERIOR WALL PAINTING

Exteriors are as essential as the interiors and walls aren’t any different. Lots of attention and detailing is performed while planning interior wall painting, exactly the same can also be relevant towards the exteriors which the majority of us frequently ignore. Exterior walls undergo periodic deterioration after being uncovered to heat, dust and water with the year. Here are a couple of options that may be considered:

Exterior wall inspection: Before deciding the color schemes it is important to have an inspection done of the exterior walls. You are able to approach a specialist with this based upon the feedback on the health of the walls after that you can take the next phase.

Cleanup: Knowing the health of your exteriors they come cleaned. Including washing, scrapping from the old paint, elimination of dirt and stains. For wall painting it is best to possess plain surface so the paint spreads evenly around the walls and also the preferred final finish is achieved.

Choice of exterior paints: Choosing the right type of exterior paint is crucial, as painting them frequently is not possible and also you want your walls to look great for some time a minimum of. You will find an array of paints that you can buy varying from gloss to texture based on your financial allowance and requirement. Some exterior paints are dust and algae resistant that will surely benefit your exterior walls.

Colour Selection: Knowing the type of paint that the exterior walls require you are able to choose the colour combinations. You can buy colour schemes like monochromatic, similar or using warm and awesome colours, the options are endless. Selecting top quality paint can also be crucial as you wouldn’t would like your paint to nick off inside a couple of several weeks of their application, making you opt for a renovation once again.

Use of Paint: Once you have finalized the shades and the kind of paint you need to use, the next thing is use of paint. Following a pre and publish wall painting instructions will increase the lengthy existence of the walls. Do purchase a reputed painter even when it is you a bit more. Exterior walls are the initial factor that individuals see you wouldn’t wish to leave a poor impression with regards to you in it through getting a shoddy painting task finished.

Start at the top, and work down, for a great finish.

The final tip I will give you today is to start your painting at the top of the house, not the bottom.This at first seems obvious but with the inexperienced painter may be lacking confidence they often start at the bottom and work up. We know this as quite often the keen DIY painter will start the job, realise he or she can’t finish it and then they contact NEVER PAINT AGAIN to finish the work for them!

Why do you think that TOP decorators are known by that very moniker? TOP!

You must always start at the top, yes on the ladder or the scaffolding, and work downwards, even if only to be bale to have the opportunity to paint over those splashes from your brush or roller whilst painting the top floor exterior? There is a method and a correct way to do almost everything in life, and, provided you take heed to this collection of pretty simple tips, and use the method correctly to paint your house, you shouldn’t have any problems.

And the final take away….

Digital DJs Equipment

Things the Wedding DJ Wishes You Knew

There’s more to DJing a wedding reception than throwing on a first dance. Behind the scenes, professional DJs must work with the couple to set expectations, understand tastes and needs, reflect their desires and make guests happy, too — not to mention reacting to the unexpected

We work more than four hours for your wedding. With planning meetings, production and creating a playlist, a professional wedding DJ will spend on average 10 to 12 hours preparing and performing for your reception.

Your musical taste may not be the same as your guests. Be open-minded to songs that will appeal to you and your guests without compromising your musical taste. A professional DJ can help you fill both needs to keep the dance floor happy

Considering a club DJ instead of a wedding DJ? Having a club DJ rock your reception can be exciting. But make sure he or she knows more than how to mix music. Today, the role of the wedding DJ has evolved into being a true master of ceremonies, someone who is comfortable making the appropriate announcements at the appropriate times. An experienced emcee can command attention, but does not need to demand attention — and knows how to react to the unexpected.

Back that thang up! A professional DJ will have backups in place in case of system failure, illness or personal emergencies. That includes backup equipment, laptops and hard drives, as well as having your playlist on multiple devices in case one goes down. That way your first dance doesn’t end up being a round of “Hokey Pokey.”

Things People Don’t Tell You About Being A DJ

While successful DJs are showered in fame and glory, there are many things people don’t tell you about being a DJ.

Most people who have been in the electronica scene have fantasized about being a DJ at least once. It must be amazing to see people dancing to the music you make, seeing how your music affects your fans, and getting paid to party, right?

Well, yes. Being a DJ is awesome at times, and it can be a great way to live out those high school fantasies you’ve had for all those years. They’re popular, they have sexy girls approaching them, and they get paid to do what they love.

But, there’s a lot that people don’t know about being a DJ. Here are some of the things that people tend to overlook when they think about their DJ fantasies.

Nightclubs don’t exactly advertise for DJs when they need a headliner. In fact, the only companies that will do that are those dinky little birthday party companies that are hired for middle school birthday parties. If you’re wondering how to get bookings, it all comes down to who you know, what your mixes sound like, and how convincing you can be.

And overly long and kinda silly list of things people do that annoys DJs

If there’s one thing DJs love more than telling people how they’re DJs, it’s how much they fucking hate people who fucking request songs while they’re practicing their art. We guarantee it. Try it. Next time you’re walking along a street and you see someone walking along the other way, we dare you to just say, “Hey what’s going on?” And 9 times out of 10 they’ll reply, “Hey mate, I’m a DJ and fuck let me tell you about this cunt who kept hassling me behind the decks last night.” No word of a lie. Any street. Any time. There’s more of them than vegans.

Weird thing is, even though people requesting songs from DJs is such a hated act, it still happens heaps. In fact, a recent study has confirmed that in the time you’ve spent reading this article so far, already 23 poor souls have had a phone thrust into their face with the name of some song in it, totally interrupting their flow and thus killing the vibe of the night.

To ease some of their pain (and also to help you not make DJs any angrier than they already are), we’ve compiled a list of things for you to keep on you at all club-going times. So next time you’re grooving away on the dancefloor dancing like nobody is secretly snapchatting you, and you feel like maybe you’ll have a chat to the DJ, pull this list out. And see if what you’re about to do is on this list. Because if you do, rest assured the 1000-yard stare that greets you upon request will burn a hole in your soul for all eternity.

Things People Say To DJs

People say some funny things to DJs when it comes to attempting to persuade you to play music that is not in the style of what you’re currently playing and/or doesn’t go with the theme of the night.

Most of these people don’t understand that you aren’t meant to be a jukebox, or an extension of what they were bumpin’ in their car on the way over.

A DJ’s job is to read the overall crowd and find a happy medium between what they want & what you have to offer. You are creating a journey that usually starts off as background music and slowly gets in their veins as the alcohol begins to kick in. You are creating a soundtrack for the night & although you are flexible, the last thing you want to do is get derailed from the vibe you’ve been building to play a request that doesn’t have anything in common with this theme.

Imagine how terrible some movies would be if the audience got to pick the playlist for the movie’s soundtrack. Imagine people bombarding the film booth with off the wall requests during the movie. I can respectfully say that Beyonce would completely ruin the flow of Donnie Darko.

So as we continue with this parallel between a DJ set and a movie soundtrack, lets discuss & translate some common things people say to DJs that attempt to derail us from the story we are telling through our track selection.

THINGS DJS SHOULD DO ABOUT COVID-19

The DJ industry is bracing for the novel coronavirus disease (COVID-19), a pandemic that will test the resolve of the entertainment industry as nightclubs close, events are cancelled, and uncertainty slows future bookings.  Our challenge right now is to ensure the safety of ourselves, our family, and our friends, while still maintaining a business under adverse conditions and fearful economic times for everyone.   The stock market is volatile – which brings fear to event planners, couples, and parents alike, as the market’s dip was also the first indication of a poor 2008 and 2009 booking season for many that were around.  To that extent, I have created the following ten things you can do today as professional entertainers to help maintain your business, your client satisfaction, and your own peace-of-mind

STAY CALM

“This too shall pass” is a Persian adage that reminds us that the temporary challenges before us are just that…temporary.   Even if the pandemic extends for multiple months, this will eventually appear as a blip on the radar of our lives.  It may bring temporary financial hardship, fear, and uncertainty, but remember – we will get through this crisis just as we have done through other national emergencies and difficult situations.  I have seen a sea of red posted on the calendars of multi-op DJ companies – resulting in tens or hundreds of thousands of dollars in lost income.  This seems like the end of the world and the end of the business you built, but it doesn’t have to be.  Take one baby step at a time.  Don’t make extreme decisions or let your emotions get the best of you.  Reach out to family and friends if you feel panicked or depressed.   You’ve got this! 

GET PREPARED

The pandemic has caused issues with getting cleaning items and food supplies.  As soon as possible, ensure you have at 3-4 weeks of food on hand – rice, pasta, cereal, tuna, canned foods, nuts, frozen meats, baking items and veggies are all good options.  As you get low on food, head to the store late at night (about 30-40 before they close) to reload your pantry – there will be fewer people to interact with, and workers will be busy stocking shelves for the next day.  Don’t forget the cold and flu products – they can’t cure or eliminate coronavirus, but they may be able to help with symptoms, and while people aren’t sick, they are actually readily available everywhere as of today in my area of the country.

STAY CLEAN & HEALTHY

If you are lucky enough to still be working during this, be sure to use sanitizing wipes (Lysol, Clorox, etc. – that kill germs on surfaces) on your gear or on the station’s/club’s equipment, before and after each use.  Make especially sure to clean microphones and any equipment touched by others during your set/shift.  Keep your distance from patrons at clubs and strategically set up your equipment to prevent people from jumping up in your face.  Wash those hands frequently with hot/warm water and soap for at least 20 seconds and sanitize with 60+% alcohol-based hand sanitizer.  Eat plenty of protein and get lots of sleep (it will keep your body ready to fight off the virus and it will allow you to not snack or consume your food stockpiles from being awake at 3am).  Don’t shake hands or touch your face, eyes, or mouth.

AVOID CUSTOMER & PUBLIC RELATIONS GAFFES

Crisis separates the men from the boys and the women from the girls.  If you want to be professional, now is the time to shine.  What’s the best thing to do about cancellations?  Start with not posting social media comments like… “If I have to listen to one more b!@ch ask for her wedding deposit money back, I’m going to kill somebody!”   Seriously, now is not the time to post anything unnecessary on your social media pages.  Thanking customers for their support is a nice gesture, but worded poorly, may be a sign of weakness.  Stand strong and confident (but not cocky) in the face of uncertain times.   Have multiple people that you trust for their communication skills (not just other DJs) proofread any major post or email you put forward.